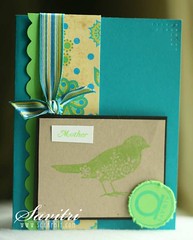
Showing posts with label Holiday Crafts. Show all posts

Wednesday

Mother's Day Craft Ideas

When Mother's Day rolls around, kids want to show their moms just how special they are. Store-bought gifts and cards are nice, but they lack that personal touch. Something made just for Mom has much more sentimental value, and kids don't have to spend much money (if any) on it.

Even toddlers can make Mother's Day crafts with a little help. Here's a sampling of things kids can make for Mom.

Framed Photos

Every mother loves to look at pictures of her kids. So why not pick out a favorite picture or yourself with Mom and create a beautiful frame for it? There are many ways you can go about making photo frames.

Friday

Gifts from the Heart – How to Make Inexpensive but Memorable Mother’s Day Presents

Are you trying to think of unique ways for you and your children to say “I love you!” to the women in their lives? Concentrate on gifts from the heart. Then learn how to make inexpensive but memorable Mother’s Day presents any mother will love.

When you’re trying to be frugal during any holiday, home-made gifts can’t be beat. They are the perfect gift because you know Mom will love them simply because her child made them. And most home-made gifts are inexpensive to make. They’re sure to be special to the moms in your life.

Gifts that are like a frozen moment in time are surely to be memorable. Create any number of gifts using the handprint or footprint of the children. Mom will be delighted with these gifts.

Wednesday

How to Make a St. Patrick’s Day Leprechaun

Faith and begorra! St. Patrick’s Day is right around the corner. To liven up your home, teach the children how to make a St. Patrick’s Day leprechaun. Not only will it brighten your home, it will also give the wee ones a chance to enjoy hands-on crafts.

Many people associate the leprechaun with Ireland, but don’t realize there are crafts which allow children to make them. In fact, with items found around the home, your child can make more than one leprechaun. And who knows, if you find leprechauns you may also find a pot of gold!

You may be able to find many of these things around your home. For those you can’t find, they’re relatively inexpensive or you can find and print some things off of the internet.

Here’s what your child will need:

Tuesday

How To Make Felt Christmas Stockings


The Christmas stocking is a holiday staple for families with children. Kids love to get up on Christmas morning and see what kinds of goodies Santa has left them! Small stockings are also great for decoration, and they're ideal for holding small gifts to give to your friends and family.

Making felt stockings is very easy, and it's a great family project.

Here's how to do it:

What You Need

* Felt
* Cardboard or card stock
* Marker
* Scissors
* Straight pins
* Needle and thread
* White faux fur and other embellishments

Instructions
  1. Draw a stocking shape of the desired size on a piece of cardboard or card stock. Cut out.
  2. Place the cardboard shape on the felt, trace around it, and cut out. Make two pieces for each stocking.
  3. If you want to sew buttons, fabric or other embellishments on the stocking, it will be much easier to do so before you sew it together. Just make sure to sew them onto the side that will be facing outward.
  4. Pin the pieces of felt together, wrong sides facing out, and sew around the edges with a sewing machine or by hand. Be sure not to sew the top closed.
  5. Turn the stocking inside out so that the seams are now on the inside. Decorate the outside using fabric paint, glitter, beads, or anything else you like. Sew a strip of faux fur to the top if desired.
  6. Cut a strip of felt an inch or so wide and 3 or 4 inches long. Fold it in half to make a loop and sew it to the top left corner of the stocking.
Letting the kids decorate their own stockings gives them an opportunity to express themselves. They could add charms that reflect their interests and hobbies, make pictures with beads, or use finger paint to add handprints. Tubes of fabric paint or glitter glue make it easy for them to write messages to Santa and add their names.

Scraps of holiday fabric are great for adding a decorative touch to stockings. You could cut out shapes such as Christmas trees, angels, or reindeer and sew or glue them to the front of the stocking. If you want a different look, you could even use a sturdy fabric such as canvas instead of felt to make the body of the stocking.

Making and decorating your own Christmas stockings is lots of fun, and it's very inexpensive. Whether you're making them to hang on the tree, fill with gifts for friends, or place on the mantle for Santa to stuff, it's a wonderful way to get the family creative together during the holidays.

Recommended products:

Friday

Decorating the Perfect Easter Egg


The perfectly decorated
Easter egg begins with the egg. Two of the most popular ways to decorate eggs begins with either a boiled egg or a blown (or hollowed egg).

Boiled Eggs

To avoid rubbery eggs do not cook eggs in boiling water. Instead, boil the water and remove the pan from the stove. Submerge the eggs in the hot, boiled water for 15-17 minutes.

Blown or Hollowed Easter Eggs

To hollow out an egg simply wash and dry your eggs. Then taking a thin needle, carefully poke a hole in each end of your egg. Cover the holes and shake the egg. Place your egg over a bowl or other container and gently blow into one of the holes in your egg. The egg white and yolk should make its way out of the other hole. Once the insides have been blown out wash and dry your egg again. Some eggs are easier to hollow than others. It will take patience and although more fragile, a hollowed out egg can be decorated and kept for many years to come depending upon how it is stored.

Decorating Ideas

Decorating your egg can be as simple or elaborate as you would like it to be. You can make beautifully designed Easter eggs with items you probably currently have in your home. Some of these ideas work egg-ceptionally well on the hollowed eggs.

• Ribbons – take leftover ribbons and glue them to your egg in the desired colors and patterns (blown eggs)

• Glitter – spread your egg with a thin layer of glue and then roll the egg around in glitter (superfine glitter will give your egg a sugared look (blown eggs)

• Lace – using the same principle as the ribbons decorate your egg (blown eggs)

• Sponge Paint – dig out your sponges and craft paint to create an original design

• Stickers – let the kids decorate using their favorite stickers

• Crayons – with a parent’s help color on a warm egg

• Mosaic – be creative and glue pieces of tissue paper, small pasta pieces or shells to your egg.

These recipes will come in handy if you have decided to stick with the tried and true dyed Easter egg

Simple Egg Dye

Combine 1/2 cup boiling water, 1 tsp. vinegar and the food color together adding drops of food coloring to achieve desired colors. Dip hard cooked eggs in dye for about 5 minutes or until desired color.

Natural Egg Dye

Dye your eggs in boiling water, with vinegar and the item used to create the desired color, boiling both eggs and dye items together. Don’t forget to compost your dye items when you are finished dyeing your eggs.

Color ideas:

Lavender
Small Quantity of Purple Grape Juice
Violet Blossoms plus 2 tsp Lemon Juice

Violet Blue
Violet Blossoms
Small Quantity of Red Onions Skins

Blue
Canned Blueberries
Red Cabbage Leaves

Purple
Grape Juice

Green
Spinach Leaves
Liquid Chlorophyll

Greenish Yellow
Yellow Delicious Apple Peels

Yellow
Orange or Lemon Peels
Carrot Tops
Celery Seed
Ground Cumin
Ground Turmeric
Saffron

Brown
Strong Coffee
Instant Coffee
Black Walnut Shells

Orange
Yellow Onion Skins

Pink
Beets
Cranberries or Juice
Raspberries
Red Grape Juice
Juice from Pickled Beets

Red
Lots of Red Onions Skins

Hard boiled, hollowed out, color dyed or fancier designs, anything goes when decorating your eggs for this Easter season. The only rule is to have fun.

Wednesday

5 Christmas Crafts for Kids

The kids are home for Christmas break and are bored already. The weather is cold, wet and nasty. What do you do? Keep them busy making something with their hands, instead of you tearing your hair out. Here are some fun ideas that kids will love.

1. Christmas cards are always a great craft.


Provide the kids supplies like construction paper, card stock, scissors, glue, glitter (the bottles of glitter/glue in one package are a very nice low-mess way to dress up a project), pencils, crayons or markers and old Christmas cards. Let the kids use their creative energy to make wonderful handmade cards that can be shared with family and friends. By cutting pictures out of old cards, even the younger children can make something really nice (and recycle at the same time).


2. Snow globes are a favorite.


If you want to make your own, gather glass or clear plastic containers, like baby food jars or mustard or mayonnaise jars. Wash and dry them completely. Gather small plastic Christmas or winter decorations. Try to find some that float. Winter themed stickers or small foam cutouts are also nice. Decorate the outside of the jar with stickers or glue a few of the foam pieces on it. Attach a couple of the floating pieces (things like snowflakes or stars work well) to string and glue a figure to the inside with the string underneath the figure to anchor it (which will become the base). Fill the jar with water and some glitter. Carefully glue the lid in place using waterproof glue and let dry. Once dry, shake it, set it lid down and watch the glitter swirl around.


3. Candy crafts can be fun, as well as a tasty gift.


A train can be a quick craft that can be used as a decoration or gift. Use a roll of hard candy (like Lifesavers) for the main part of the train. Use individually wrapped round candy, like peppermints for the wheels. For the front, glue a square candy, such as a caramel or a Starburst with a Hershey kiss on top. If you add a string, they can be used as a tree decoration. Experiment with other kinds of candy to create other things, like robots, animals or even angels.

4. Garland trees can be a great project for the kids, especially if there is limited room for a Christmas tree.

Take a large piece of green poster board and cut a circle, with a slit out to make a cone. Tape it with clear packing tape. Take an artificial pine garland and wrap it around the cone, completely covering it to create a small tree. Fasten the ends in place so it doesn't unwrap. The tree can be decorated with lightweight paper ornaments that the children can also make.


5. A cozy fireplace can warm up any room but not everyone has one.

Let the kids make one. Find a large cardboard box and cut an opening in the one side for the fireplace. Using sponges, paint bricks on the box, leaving space in between to be the mortar. Paint the inside black if you want. Paint flames on the inside back section of the box. Use paper towel rolls to stack up in the fireplace as logs. Decorate the top to look like a mantel.


Get creative and think up your own Christmas crafts as well. Children will love the fun involved in creating these crafts and so will you. You can even give the crafts as a gift which will warm even the scroogiest of hearts.


Recommended:

Reblog this post [with Zemanta]

Saturday

Fun Autumn Craft Ideas

Autumn is such a fun time. Leaves turn shades of golden orange and brown. Use this beautiful creation of nature to your advantage. Focus on leaves for inspiration with these fun autumn craft ideas.

Leaf Tracings

Fold 10 sheets of copy paper in half and crease in the center. Bind the booklet by punching two holes in the spine, threading yarn through the holes, and tying the ends. Take your kids to the park. Challenge them to find and trace as many unique leaves as possible.

Book of Leaves

Make a booklet, as described above. This time, have your child search for odd-looking leaves to collect and place in their book. Then give them an encyclopedia and let them research their leaves. Have them write down the name of each leaf and three interesting facts about the leaf.

Leaf Characters

Draw and copy different types of leaves onto thick construction paper. Let your kids cut out the leaves and apply glitter to add sparkle. Next, have them create leaf characters by gluing leaves together to create a face, body, and limbs. After the glue dries, they can draw faces on the leaves with markers.

Leaf Collage

Gather as many types of leaves as you can find. Glue the leaves in any kind of arrangement onto a piece of construction paper or cardboard. Alternatively, spread white school glue across an entire sheet of paper or piece of cardboard. Crumble leaves at random over the glue. When the glue dries, you will have an awesome leaf collage.

Easy Homemade Fall Centerpieces

Fall is a season of inspiration for crafters and interior decorators. It's full of beautiful, vibrant colors that are unlike those of any other season. It's no wonder that so many people love to bring those colors indoors.

If you're looking for ideas for beautiful fall centerpieces, there's no need to look any further than your own garden and back yard. The leaves and plants that provide the natural beauty of the season will also look absolutely stunning on your table.

Here are some centerpiece ideas that your guests will love.

Mini-Pumpkin Candleholder Centerpiece

Gather up some miniature pumpkins, and cut a circle in the top of each that is large and deep enough to hold a tealight candle. Use as many or as few as you like. Arrange the pumpkins on a clear glass platter. Add silk fall leaves, small pinecones, and other items found in nature to create a quick but beautiful centerpiece.

Cornucopia

The cornucopia (also known as a horn of plenty) is a Thanksgiving decorating staple, but it makes a beautiful centerpiece throughout the fall. You can buy cornucopias at most craft stores in the fall in a variety of sizes. Simply add real or fake fall fruits and vegetables such as apples, pears, corn, squash and berries. Silk leaves and ribbon in fall colors will complete the look.

Fall Basket Centerpiece

A basket full of fall beauty makes a lovely centerpiece. Sturdy, handmade baskets look great when filled with fall flowers, gourds or berries. Try arranging silk mums in floral foam, adding some moss and silk leaves for a finishing touch. Or jazz it up a bit with some beaded fruit and coordinating ribbon.

Pumpkin Flower Arrangement

Pumpkins and fall flowers go great together, so why not turn a pumpkin into a flowerpot? All you have to do is cut a circle out of the top of a large pumpkin and clean the inside out. Spraying some polyurethane on the outside will add shine and protection, but it's not necessary. Then you can add potting soil and plant some real flowers in there, or use styrofoam or florist clay to arrange silk flowers.

Canning Jar Centerpiece

You can use canning jars to create a variety of centerpieces. They make great containers for fall potpourri or floating candles. Or you could fill them with pinecones, silk leaves and berries. They also create a rustic look when used as flower vases.

These easy to make fall centerpieces can add lots of beauty to your kitchen table. And since you can find many of the materials in your garden or in nature, they are inexpensive to make. You can change them out every week or so if you like, without putting a strain on your budget.

Enhanced by Zemanta

Thursday

Special Ways to Celebrate Father’s Day

by EarTwiggle

The third Sunday in June is a special day that is set aside to honor our fathers and the other special men (stepfathers, grandfathers, uncles, brothers, etc.) in our lives. You have probably heard the saying “The way to a man’s heart is through his stomach.” This Father’s Day you can make that saying come true. Plan a barbecue and make and bottle some homemade barbecue sauce for dad. (Go to http://www.kidssoup.com/ for instructions) Invite family as well as friends who are close to your dad or just let it be you and your dad. For dessert, set up an ice cream sundae bar. No dessert could be simpler than the ice cream sundae—a scoop of ice cream, a sweet topping, a dollop of whipped cream, and a cherry at the top. Provide a variety of flavors of ice cream (make sure that Dad’s favorite flavor is there) and toppings (crushed cookies, small candies, sprinkles, nuts, crumbled candy bars fruit toppings, hot fudge, caramel topping, chocolate syrup, whipped cream, and maraschino cherries).

Things to Do with Dad

With children, make a list of things that they can do with their dads or other special men in their lives
(fly a kite, plant a vegetable garden, lie underneath the stars, build a birdhouse, play catch, make popcorn and watch a favorite video, pack a picnic, go for a bike ride, read a book or spend time on the computer together, etc.).

Treasure Hunt

Take a walk and pick up as many neat treasures as you can find while you are walking (like bottle caps and bits of wire). Make a picture with your findings and add some glue. Place it inside a frame with no glass.

Father’s Day Cards

If you’re having some trouble choosing a card, why not make one yourself? A handmade card or note from the heart speaks more of your feelings than the store bought variety. We have several card patterns from which to choose on our site.

Father’s Day Coupons

Make a book of tickets that Dad can redeem for things like “One board game with me” or “One free hug.” For a special presentation, wrap them up in a small box and tie with ribbon or yarn.

Games Day

Have a Games Day. Get together with a few other people and play games. Each person brings a favorite board game to share or picks an outdoor game everyone can have fun with like soccer or croquet.

Crown Dad King for the Day

Have children make Dad a crown. Get a big sheet of paper and draw a crown shape. Decorate it with glitter, yarn, ribbon, pom-poms, fancy buttons, sequins, or whatever you have on hand and staple it together.

To find other easy-to-make Father’s Day gift ideas, Father's Day poems or quotes visit
www.kidssoup.com.

Jolanda Garcia is a former teacher and educational content designer. Her goal is to provide parents and teachers with quality resources to promote their children's development and creativity. Visit her websites at:
Preschool activities and crafts , and Father's Day gift ideas

Article Source: Lady Pens


Zemanta Pixie

Monday

Four Homemade Mother's Day Cards to Make

Mother AlwaysImage by scrapbit via Flickrby Rachel Paxton

There is nothing as special or personal as a homemade Mother's Day card. Surprise your friends and family with your handmade creations. Here are some ideas to get you started.

Materials:

Four blank greeting cards (available at craft stores),

scrapbooking paper with floral pattern, coordinating solid piece

of scrapbooking paper, creme or white colored cardstock

(whichever matches other papers best), paper cutter, scissors,

glue stick, computer, printer, sewing machine.


Card #1:

For this card you will need a floral piece of scrapbooking paper, a coordinating piece of solid colored scrapbooking paper, and a piece of white or creme colored cardstock. Cut a piece of the solid colored paper to fit the front of the greeting card and glue it in place. Cut an approximately 2-inch strip of the floral paper and glue on lefthand side of card as a border. Use your sewing machine to stitch* along the righthand side of the floral border and around the outside edge of the card. Cut a large square out of creme colored or white card stock and glue to
the center of the card. Type "Happy Mother's Day" on your computer and print out on white or creme colored cardstock. Cut out the phrase (narrow strip) and glue to the bottom of the
square in the center of the card. Choose a flower from the floral paper and trim to fit in the center of the square on the front of the card. Glue in place.

* Stitching tips: If you have never used your sewing machine to make cards, it is easy! Just sew on the paper like you would on fabric. You might want to reserve a needle just for paper so you
don't dull the needle for your fabric projects. There are two ways you can include stitching in your card making projects. You can either stitch directly on the card, or you can stitch on a
separate piece of paper and then glue that piece to the card
(then the stitching won't show through the card).


Card #2:

This Mother's Day card is quick and easy. Cut a piece of the solid colored scrapbooking paper to fit three-quarters of the front of the card. Carefully tear along the righthand edge of the paper and glue the paper in place. Next cut a piece of floral paper to fit half of the front of the card. Carefully tear along the righthand edge of the paper and glue on top of the solid colored piece of paper. Type "Happy Mother's Day" on your computer and print it on white or cream colored paper. Mat the cut-out phrase first on a piece of the solid colored paper, then glue to front of card. Stitch around the outside of the card if you wish, but it isn't necessary.


Card #3:

This card will open horizontally. Cut three approximately 3-inch strips of paper to fit width of card: two floral and one solid colored. Tear bottom edges of each piece. Beginning at top of card overlap the three pieces with floral paper first and glue in place. Cut a large square from the cream or white colored paper and glue it in the center of the card. Cut a slightly smaller square of solid colored paper and glue in center of cream colored piece. Type "Happy Mother's Day" on your computer. Print on cream or white colored paper, trim, and glue in the center of solid colored square. Stitch around the edge of the card, if you wish.


Card #4:

This card will open horizontally. Tear a rectangle from the solid colored paper and glue near top of card. Type "Happy Mother's Day" on your computer and print on white or creme colored paper. Trim and glue to center of solid colored paper. Tear another piece of solid colored paper (larger than first) to glue across the bottom of the card. Cut a rectangle from floral paper and glue to center of bottom piece of solid colored paper. If you wish you can accent edges of floral rectangle with coordinating eyelets.

Notes: - The terms "card stock" and "paper" are used interchangably here, but it is up to you which kind of paper you use, depending on the look you are trying to achieve - A sewing machine isn't necessary for this project, it is just a nice added touch - You don't have to use your computer for this project, you can handwrite the words if you wish.

Happy Mother's Day!

Rachel Paxton is a freelance writer and mom of four. For scrapbooking, card making, gift-giving ideas, and more family memory-making activities, visit http://www.crafty-moms.com . Photos of finished cards:
http://www.crafty-moms.com/cards/mothers-day-cards.shtml

Article Source: Lady Pens
Zemanta Pixie

Saturday

Easter Party for Children

Want to do more than the traditional Easter egg hunt this year? Kids love to have fun and play games, so plan an entire party around the Easter egg hunt and make an afternoon of it. Here are some ideas for activities you can do to make your party a hit. And, don’t forget the prizes.

Pin the chick on the egg? Since this is Easter we must tailor the games to fit the occasion. Take a piece of white poster board and draw a large egg on it. Cut it out and pin it to the wall. Give each child his or her own piece of construction paper. Let the children draw and cut out their own baby chicks. When they are done, fold a piece of tape and stick it to the back of each chick. Blindfold each child in turn and let them see who can put their chick closest to the center of the egg.

Word games anyone? On the internet, do a search for Easter word games. They have printable pages like word search and word scramble that are grouped by age. Give a prize to the winner of each word game.

Duck, Duck, Goose! Everyone knows this one. All the children sit in a giant circle. One child will walk behind the others tapping each “duck” on the head until they decide which one of their friends will be the “goose”. The “goose” has to get up and chase the first child. If the first child makes it back to the empty spot without being touched, then the second child becomes the new “duck”.

Easter necklaces. Pre-cut strips of construction paper in pastel colors. Show the children how to make chain links. Fold the paper in a circle, dropping a spot of glue on one end and pressing the two ends together. For each new link, fold the paper in a circle around the previous link so they form a chain. When the chain is long enough to fit over your head when held end to end, add one more link to join the two ends of the chain.

Treat time. Serve snacks like little sandwiches, juice, and a small dessert. For a change, use cookie cutters in the shapes of Easter characters to cut the sandwiches. For the dessert, try making lemon squares. There is a good recipe on www.foodnetwork.com.

You don’t need too many activities to keep children happy at a party. As long as they know it will end with an “egg”citing Easter egg hunt, they will have fun!

Thursday

4 Tips To Accident Proof Your Easter Egg Decorating

For kids, dunking plain white eggs into a bowl and watching them turn a different color is almost magical.

Here are a few ideas to help minimize the Easter Egg decorating mess this year.

1. Try stickers.

If you are not attached to the traditional method of egg decorating, this is a way to minimize the muss and fuss during Easter. Stickers make easy decorations. They leave nothing to clean up afterwards. And, there’s nothing tricky about it. Just purchase ordinary Easter stickers and stick them onto the eggs. Presto!

2. Dye eggs at the stove.

Avoid the mess that comes with sitting your children at the table with their own dipping cups. Mix the dye ingredients in a five quart Dutch oven. Wrap an apron around the child. Let the child take the dried boiled eggs and place them in the dye solution. When the eggs are ready, use a slotted spoon to lift the dyed eggs out of the pan. The slots leave less liquid on the spoon which means less liquid on the stove, the floor, you, and the kids. Spoon the eggs back into the carton. Place the cartons in the refrigerator until time to use them.

3. Work on the kitchen floor.

The lower you are to the ground, the shorter the distance a boiled egg has to fall. Spread an old vinyl tablecloth on the floor. Give each child an apron and a pair of exam gloves. The gloves can be purchased from any medical supply store. Gloves allow the children to dip the eggs with their hands instead of a spoon. When they have finished, have them take their gloves off and throw them away.

4. Purchase a ready to use Easter egg kit.

PAAS® has been making egg decorating materials for years. Each year they seem to come up with something that will make the egg decorating process easier and faster. They feature egg wrapping kits which create virtually no mess at all. The pre-formed pattern is ready for the decorator to transfer to the dried eggs. They also offer egg cups with their own dipper so you don’t need spoons at all. You can purchase PAAS® products wherever decorating items are sold, including most grocery stores and craft stores.

Easter Egg decorating is great for everyone, but no one likes to clean up at the end. Make it easier on yourself this year, Mom and Dad. Try these tips for some good clean fun.

Friday

Three Fun Easter Crafts for Kids

We love to make crafts to give away and display for the holiday season. Here are three ideas to enhance the festivities observed during Easter.

Egg maracas

You will need:
Plastic eggs
Glue
Rice, BB pellets, or marbles
Enamel craft paint
Newspaper
Paint brushes
Bowls of water

Clear a space on the table and cover with newspaper. Each person should have their own bowl of water, a paint brush, and plastic eggs.

1. Choose a filling for the egg.

2. Once the filler has been added, dribble a thin line of glue around the egg opening. Snap the egg shut. Wipe off any excess glue.

3. After the glue dries, let the children choose a paint color to decorate their eggs.

4. Let the eggs dry on the newspaper.


Tissue paper Easter bouquets

You will need:
Tissue paper in assorted colors
Green pipe cleaners (eight per child)
Styrofoam blocks (optional)
Plastic or glass vases
Scissors
Ribbon in assorted colors

Clear a space on the kitchen table and give each child a vase, pipe cleaners, and a pair of scissors.

1. Pick the colors for the flowers from the tissue paper pile.

2. Have the children take several sheets of paper. Roll them up together. Wrap one end of a pipe cleaner around the center of the tissue paper and twist to secure it.

3. Separate each sheet of paper, creating folds. Pull the edges up so that they surround the end of the pipe cleaner. If the paper is too long, cut it down.

4. Continue making flowers until the bouquet is finished. Wrap a piece of ribbon around the flowers.
5. The flowers can now be placed in the vase. If you want to keep them from falling out of the vase, stick the free end of the pipe cleaner into a piece of Styrofoam. Cut the Styrofoam to fit the bottom of the vase.


Easter cards

You will need:
Card stock paper
Markers
Stickers (Easter themes)
Scissors
Glue
Construction paper

1. Cut the paper to the size wanted for the Easter cards. Fold the paper in half. The children can also cut the paper into shapes like eggs or bunny rabbits.

2. Decorate the outside of the card with pictures and/or stickers.

3. Using a marker, have the children write their own special greeting on the inside of the cards.

4. The children can hand deliver the Easter cards to their favorite people in the whole world.

Craft making is doubly fun when shared with family. Make this a regular part of “together” time instead of keeping it just for special occasions.

Wednesday

Chocolate "Stuffed with Love" Valentine's Day Cupcakes

Ingredients:

CupCakes

* 3 cups all purpose flour
* 2 cups sugar
* 2/3 cup Hershey's Cocoa
* 2 teaspoons baking soda
* 1 teaspoon salt
* 2 cups water
* 2/3 cup vegetable oil
* 2 tablespoons vinegar
* 2 teaspoons vanilla extract

Filling:

* 1 package ( 8 oz.) cream cheese, softened
* 1/3 cup sugar
* 1 egg
* 1/8 teaspoon salt
* 1 cup Hershey's Semi Sweet Chocolate Chips or Mini Chips

* Red food coloring

Directions:

Prepare filling; set aside.
Heat oven to 350 degrees. In large mixing bowl combine flour, sugar, cocoa, baking soda and salt. Add water, oil, vinegar and vanilla; beat on medium speed 2 minutes or until well combined. Fill paper-lined muffin cups ( 2 1/2 inches in diameter) 2/3 full with batter. Spoon 1 level Tbsp filling into center of each cupcake. Bake 20-25 minutes or until wooden pick inserted in cake portion comes out clean. Cool. About 2 1/2 dozen cupcakes.

Filling Directions:

In small mixer bowl combine cream cheese, sugar, egg and salt; beat until smooth and creamy. Add 4-5 drops red food color to acheive your desired color. Stir in chocolate chips.

Friday

Scissor-less Valentine's Day Crafts for Toddlers

Valentine’s Day is a wonderful holiday for crafts. Kids of all ages can get involved in the preparations and celebration. Toddlers are too young to use scissors safely on their own, but they can still participate in craft making with the family. Here are some ideas for Valentine’s Day crafts that don’t require the use of scissors by your young ones.
Toddlers like to paint.
They learn in preschool that painting is fun and safe. Give them some finger paints in red and white and have a good time decorating just about anything.
With finger paints you have to prepare the area so that the kids have a blast without your house looking like a construction zone. Dress the kids in play clothes so that they can get messy without ruining their good clothes.
They can use their little hands to make a heart shape out of their prints. You can get them to alternate red and white prints or they can mix white and red to make a batch of pink paint for more hearts. Guide their hands to write words like “I love you” on a piece of construction paper or a poster board.
Toddlers can give the gift of flowers that they have made by themselves.
Give your toddler a variety colors and sizes of tissue paper so that they can make unique bouquets for each of their valentines. The best thing about tissue paper is that it best resembles a flower when it is crumpled up. Kids love to rip and crumble things up. With this craft, they can do those things for fun. You can crumple with them and let out your inner child too.
Once the paper is sufficiently crumpled, put the sheets together. Show the kids how to wrap a pipe cleaner around the bundle of tissue paper sheets and fluff them up. In no time they will look like flowers. Since pipe cleaners may be hard to manage, it might be a better idea for parents to add the pipe cleaner and let the toddlers shape the flowers.
Toddlers can make foam Valentine's Day Cards.
Craft stores have all sorts of good things that toddlers can use for Valentine’s Day crafting. Foam shapes come pre-made. Kids just have to punch them out and apply them to whatever surface they need to. Instead of using glue, glue sticks are less messy and a toddler can learn to handle them much easier than a bottle of glue.
You can cut out some pictures of their face and place them in the center of the foam sheet. After they decorate with the shapes, the craft can be given to grandparents or other family members as a Valentine’s Day card that is unique and special.
Toddlers don’t have to use scissors to make crafts. Each of the above valentine crafts for toddlers required no scissor use and still they make excellent crafts that are fun and still allow them to be creative.

Saturday

Groundhog Day Is A Fun Day For Kids Of All Ages...

...Especially When They Do Crafts For This Special Day

By Gail Leino

Everyone looks forward to Groundhog Day because this will mean that winter is almost over. So celebrating this special day is something that kids love to do. One great way for them to celebrate is to let them make crafts for this holiday. They will have fun and the crafts are easy to do.

One fun and easy craft they can do is the pop-up groundhog puppet. You will need to have the kids cut out a circle from brown construction paper to use for the head. Then they need to cut out a small oval for the body from the brown construction paper. Have the kids draw the mouth and eyes onto the head or you can use googly eyes. Glue the head and body of the groundhog onto a craft stick or popsicle stick. Using a paper or Styrofoam cup you want to cut a small slit in the bottom. Decorate the paper cup with markers or paint. These make very adorable groundhog puppets that kids can have hours of fun with.

A second craft that they will enjoy is the groundhog mask. Have the kids paint the back of a paper plate brown. Then they will need to draw the face of the groundhog onto the plate. They will need big eyes and a mouth. Then cut out the eyes and mouth. They will need to cut two small ears that are curved from the brown construction paper. Then glue the ears to the top of the plate. You can use a little pink circle made from paper for the nose and then glue it on. The whiskers will need to be glued on also. You can use string or pipe cleaners. Put holes in both sides of the mask and tie some string to it so that it will stay on the kids head. These two crafts will make Groundhog Day even more fun for any kid.

Mrs. Party... Gail Leino takes a common sense approach to planning and organizing events, celebrations and holiday parties with unique ideas for Groundhog Day party supplies and fun Groundhog Day party games She explains proper etiquette and living a healthy life while also teaching organizational skills and fun facts. The Party Supplies Hut has lots of party ideas with hundreds of free holiday printable games and free birthday party activities. Over 100 adorable Themes including Groundhog Day Party Supplies to fit your birthday celebration, holiday event, or "just because" parties. Party themes include cartoon characters, sports, movie, TV shows, luau, western, holidays, and unique crazy fun theme ideas.

Article Source: http://EzineArticles.com/?expert=Gail_Leino
http://EzineArticles.com/?Groundhog-Day-Is-A-Fun-Day-For-Kids-Of-All-Ages-Especially-When-They-Do-Crafts-For-This-Special-Day&id=881031

Tuesday

Snow Fun Scrapbook Layout

by Rachel Paxton


Playing in the snow is a great time to take candid pictures of your family. Where we live we might only get one or two days of snow each year, if we're lucky, so this year we decided to drive to the snow! We found a state park only a couple of hours away where they had great sledding hills, and took the whole family along for an afternoon of sledding and snow fun.

We took lots of great pictures that day. It's not often you get pictures of grandma and grandpa sledding and playing in the snow. The hard part is choosing which pictures to put in my scrapbook!

Materials Needed:

Dark blue piece of 12x12 scrapbook paper
White piece of 12x12 scrapbook paper
Paper Cutter
Glue
Two photos

I was trying to come up with a "snow" theme for my scrapbook layout. I chose a 12x12 dark blue piece of paper for the background of my page. I decided to accent the blue with lots of white to represent the snow.

For the first white accent I decided to create snowflakes to be the mats for my photos. There was only enough room for two photos on the page, so I cut out two snowflake mats.

To make the snowflake mats, I cut out a piece of white cardstock to be the size my mat would normally be. Then I folded the piece of paper in half as many times as I could and cut the corners off and cut little triangles into each side of the shape to create my snowflake. You can have fun with this part, just think back to making snowflakes as a child! I also cut out a couple of small snowflakes for extra decoration.

To add some snow to the background of my page, I took a 12x12 piece of white card stock and tore a strip of it to glue at the bottom of the dark blue background page. This gives the page the appearance of a snowy background (see photo).

Next I cut out a freehand snowman to glue on the side of the page. It really doesn't have to look perfect, it's supposed to look homemade!

I then printed out the words "Winter Wonderland" on my computer to create the heading for the page. I didn't mat this piece of paper. I just cut it out and glued it at the top of the background page.

Last but not least, I glued two photos to my "snowflake" mats and arranged them in the center of the page with the extra snowflake for an added accent.

Easy, and very cute!

Photos of finished snow fun scrapbook layout:
http://www.crafty-moms.com/scrapbooking/snow-fun.shtml

Rachel Paxton is a freelance writer and mom of four. For scrapbooking, card making, gift-giving ideas, and more family memory-making activities, visit http://www.crafty-moms.com/.

Thursday

Christmas Cheer Without Breaking the Bank

If asked, most people will say that the best part of the Christmas season is all the beautiful decorations and yummy food! Everyone loves all the sweets, cookies, cakes, pies and candy, but they also like all the cheery and warm decorations that abound everywhere!

If you're on a tight budget you may feel like you can't offer much for the holidays, but as they saying goes, "it's not the cost of the gift that counts, it's the thought". Just take a look around at what you have to work with, and of course you can always give some kind of baked goods or other homemade goodies.

We don't have much money ourselves, so I make big batches of different kind of Christmas cookies and then put them in cookie tins or on sturdy paper plates wrapped in cellophane! They are always one gift I know will always be loved regardless if the recipient is young or old!

Decorating is another thing that can be done without having a big budget to work with. Maybe you have some decorations from previous years or you can pick up some simple red, green and gold streamers to decorate around the house.

If you have some old Christmas baby clothes or stuffed teddy bears around perhaps you could put them in a small child's chair by draping the sweater over the chair and have the bear sitting snuggled in the corner of the chair. Find a nice corner of the room to place the chair or near the tree if possible.

Candles are another thing that always adds a nice touch and they can provide the atmosphere with some wonderful scents as well. The small votive candles are inexpensive and can be used in a number of ways for decorations. For instance you could put some votive candles floating on some water in a festive bowl of some kind or place them in groups of 3 on a small plate and scatter them around on the end tables or coffee tables.

Candy canes are always popular and don't cost much. You can hang them around at various places or make some candy cane bouquets and place them in some green or red glasses or other festive glasses you may have.

It's not about how much you spend it's about spreading a little Christmas cheer in the best way you can.

More Christmas Ideas:
Little Kids Christmas Crafts
The Ultimate Christmas Guide
Christmas & Advent Celebration For The Holidays Package

Tuesday

Christmas Card Organizing and Displays Ideas

The average family receives over twenty Christmas cards each year. What happens to them after Christmas? Do you throw them away? Instead of doing that, use those Christmas cards to make holiday displays.

Christmas Card Tree
The tree can be hung on string or small hooks. The smaller cards are displayed at the top. Each line gets a little wider so that you are forming the shape of a Christmas tree. The cards should be hung so that people can open them and see who they were from. For a more permanent display, the cards can be tacked to a piece of fabric that is attached to a rod. This makes the set up and breakdown easy each year.

Christmas Card Window Decoration
Christmas cards can be hung around the window like a border to make a display. The cards can be tacked directly to the top and sides of the windows. For windows facing the front of the house, make a display that can be seen from the outside. Using only the picture on the front of the cards, string them on a piece of ribbon through holes punched in the top center of each one. Secure the ribbon to the window so that the cards are in view. Let a string of white lights hang intertwined with the cards to illuminate them.

Christmas Cards as Ornaments
Your favorite Christmas cards can be displayed right on your tree. Punch a hole and run a thin piece of ribbon through each one. Knot the ribbon and curl the ends of the strands. Secure each card to the tree in a place where it will be seen. Propping the cards against a branch of the Christmas tree allows you to keep them sitting open so they can be read without disturbing the tree.

Christmas Cards Display Ideas
Christmas cards received for the current year should enjoy their day in the spotlight. Display them on the mantle. Another alternative, if you don’t have or don’t want to use the mantel is the coffee table. Have a piece of glass cut to fit the top of your coffee table. Take each Christmas card and arrange it on the top of the coffee table. Throw glitter or confetti, in Christmas colors of course, on the table among the cards. Cover with the piece of glass.

Christmas cards are not just for a year to be tossed away once the holidays are over. You can use them each year to remind us of people long gone and special moments. Finding different ways to display your cards throughout the years will let others share in your special memories too.

More Christmas Ideas:
Little Kids Christmas Crafts
The Ultimate Christmas Guide
Christmas & Advent Celebration For The Holidays Package

Making Homemade Christmas Cards with Kids

The Christmas holidays are the most joyous time of the year for families. Especially important is the time families spend together decorating, wrapping, and baking. So let’s explore how you can spend family time making homemade Christmas Cards with your kids.

Here are some items you will need. Buy a Santa coloring book and a package of colored construction paper. Cut the construction paper to the size of the cards your family wishes to make. Get out the crayons, magic markers of all colors, cotton balls, pipe cleaners, ribbons, glue or glue stick, sparkles, red, black and green fabrics, and small candy canes. Your family is ready to begin making unique Christmas cards.


Christmas Tree Cards
Make Christmas tree cards by drawing several trees on green construction paper. Cut the trees out. Glue fabric and candy to the cards for a beautiful visual effect.


Santa In A Chimney Cards
Draw a house with Santa climbing down the chimney. The card can be decorated with cotton balls for Santa’s hat and beard with a line of trees cut from construction paper for the front of the house. Use colored markers to add ornaments to the branches of the trees. Sprinkle glitter on the ornaments, as well as the tree, to resemble snow.


Santa Cards
A picture of a full-sized Santa could be cut out of a coloring book, and pasted to the front of a card. After it is colored in with crayons, add fabric to enhance the picture. Make a green sack out of material and place it over Santa’s shoulder; use black material to glue onto Santa’s boots; use the red material to glue onto Santa’s hat. You can adorn the card with small candy canes.


Reindeer Cards
Draw a reindeer and sleigh card. Instead of drawing antlers, take some brown pipe cleaners, arrange the brown pipe cleaners into antlers and glue the pipe cleaners to the top of the reindeer’s head. If the coloring book has a picture of the sleigh, cut the sleigh out of the book; color the sleigh using crayons; and paste the sleigh in front of the reindeer.

Once the fronts of the cards are decorated, your family can write a personal Christmas message inside the card, with everyone signing their names using colored crayons or markers. Or, to really make the card special, insert a family photograph and sign all your names.

Making personalized Christmas cards is probably one of the most popular craft ideas for the entire family. While the kids are on Christmas vacation, take a day to sit around your kitchen or dining room table and create memorable homemade Christmas cards.

More Christmas Ideas:
Little Kids Christmas Crafts
The Ultimate Christmas Guide
Christmas & Advent Celebration For The Holidays Package
Related Posts with Thumbnails

Entrecard Drop List